Enterprise Application How-to
Step 1 - Generate the SCIM Token
In a web browser, go to https://assetasyst.com. You’ll be prompted to login. Enter your admin account credentials. Once logged in, you’ll see the following:
Click on menu icon (next to the logo). Then click on Admin->Generate Token. You should see the following:
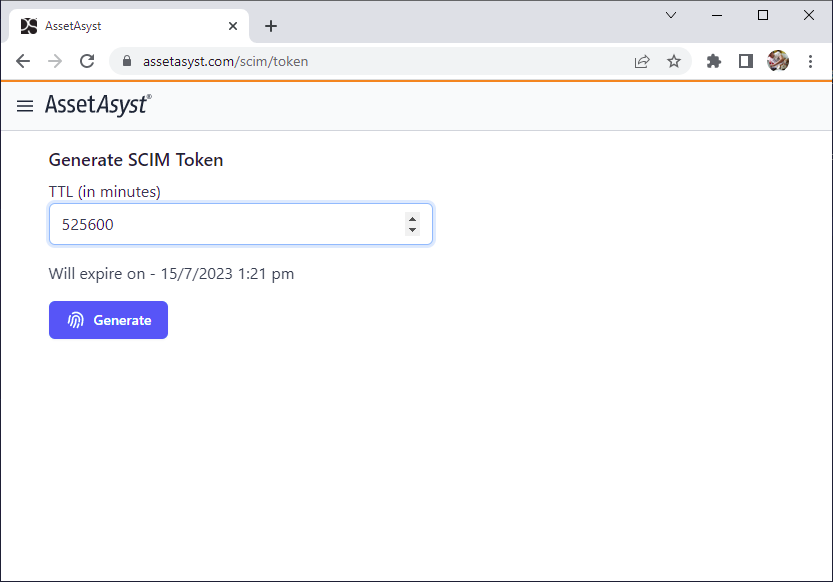
Hit the Generate button and copy the token text sequence for later!
Step 2 - Create the Custom Enterprise Application
- In the Azure Portal, navigate to
Azure ADand make sure you’re on the relevant Directory - Go to
Enterprise Applications - Click on
New Application - In
Browse Azure AD Gallery, click “Create your own application” - Set the application name to “AssetAsyst SCIM” or something else if you prefer
- Select the option to integrate with a non-gallery application, and click
Create - Navigate to the application once it is created
Step 3 - Configure Provisioning
- Click on
Provisioning - Set the
Provisioning Modeto “Automatic” - In the
Admin Credentialssection:- Set the
Tenant URLtohttps://rimmer.assetasyst.com/scim - Set the
Secret Tokento the value generated in Step 1 (above)
- Set the
- Enter what you’d like for
Settings - Click
Save
Step 4 - Group Mappings
- Click on the
Provision Active Directory Groupslink to bring upAttribute Mapping - Make sure that
Enabledis “off” - Click
Save - Return to the
Provisioningscreen
Step 5 - User Mappings
- Click on the
Provision Active Directory Userslink to bring upAttribute Mapping - Make sure that
Enabled“on” - For
Target Object ActionscheckCreate,UpdateandDelete -
Mappings are as follows:
Name Type Mandatory Azure AD Mapping Description externalId string Yes objectid Unique Guid that represents the user. userName string Yes userPrincipalName Unique name that represents user within Tenant active boolean Yes Switch([IsSoftDeleted], , “False”, “True”, “True”, “False”) Used to indicate whether the identity is active (true) or should be deprovisioned (false). emails[type eq “work”].value string mail Work email address displayName string displayName Display name for the user. name.givenName string givenName The first name of the user. name.familyName string surname The last name of the user. - Click
Save - Return to the
Provisioningscreen
Step 6 - Automatic Provisioning and Adding Users!
If you want provisioning to occur automatically, set Provisioning Status “on”.
To give users access to AssetAsyst, add them as a user to the AssetAsyst SCIM application!